
Cut Nighttime Crime 36%: Security Lighting Placement for Homeowners
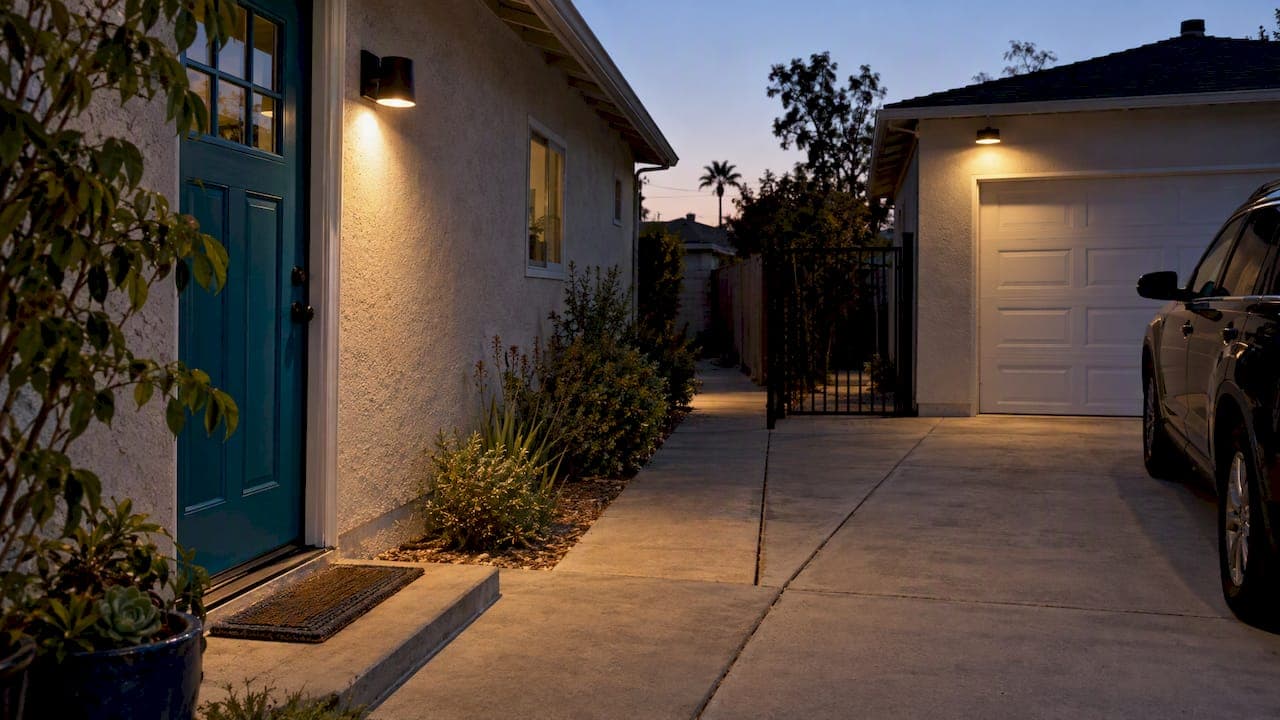
Place security lights at every door, garage entrance, and walkway, then aim them down and shield them so they light the ground rather than the street. The controlling rule is simple: illuminate access points and movement paths with downward-directed, shielded fixtures on motion or timer controls. Start with three moves: light your doors and garage, cover your main walkway and driveway, and keep every fixture out of camera view to avoid glare and overexposure.
TL;DR:
- Use downward-shielded fixtures at doors, walkways, and fences, spaced to ensure overlapping light pools and avoid dark gaps.
- Match fixture types to their specific tasks, favoring low-energy pathway lights for guidance, and shielded floodlights for wide coverage.
- Position lights along pathways people actually walk, mounting at 7 to 10 feet high and aiming them to minimize glare and avoid camera obstruction.
- Place fixtures outside camera views to prevent glare and aim them at face or entry heights for better footage during motion-triggered events.
- Integrate lighting with security systems by connecting motion sensors and cameras for coordinated deterrence and clear, night-time identification.
Table of Contents
- Types of security lighting and what each one does best
- Where exactly to place lights around your property
- Measurement basics: lumens, footcandles, and mounting height
- How to place lights relative to your security cameras
- Choosing fixtures that protect without overlighting
- Controls, sensors, and timing that actually help
- Installation tips and mistakes worth avoiding
- Applying these placement rules in practice
- Connecting security lighting to your home security system
- A practical view on deterrence versus neighborhood impact
- How we can help with electrical and outdoor lighting work
- FAQ
- Sources
Types of security lighting and what each one does best
Not every fixture serves the same purpose, and picking the wrong one for the job wastes money and light. Continuous or dusk-to-dawn fixtures work for low-traffic perimeter zones where constant visibility matters more than deterrence. Motion-activated lights are the strongest deterrent for entries and side yards because sudden illumination startles an intruder in a way steady light never does.
- Floodlights cover wide areas like backyards or parking pads but create glare if left unshielded.
- Wall packs mount flush against a building and work well for garage entries and loading areas.
- Pathway and step lights guide foot traffic at low heights without throwing light into windows.
- Camera-assist lighting is tuned to support footage quality rather than human eyesight, often with narrower beams.
Floodlights and wall packs deliver the most coverage per fixture but carry the highest energy use and the greatest risk of spilling onto a neighbor’s property. Pathway lighting uses the least energy and causes the fewest complaints, but it does little to deter someone approaching a door. Matching fixture type to task, rather than defaulting to the biggest floodlight available, is the difference between a well-lit property and an overlit one.
Where exactly to place lights around your property
Placement follows the paths a person would actually walk, not the shape of your yard. A NYC lighting study from University of Chicago Urban Labs found that increased street lighting produced at least a 36% reduction in nighttime outdoor index crimes in treated areas, which is the strongest evidence that placement along routes people use, rather than blanket coverage, drives results.
- Front and back doors: mount fixtures 7 to 10 feet high and angle them to wash light evenly down the door face and steps, avoiding a single bright pool with dark edges.
- Driveways and long walkways: space fixtures no more than about four times the mounting height apart so beams overlap instead of leaving dark gaps between pools of light.
- Perimeter rows and fence lines: stagger fixtures rather than lining them up, since a straight row creates long shadows at yard corners where someone could stand unseen.
- Garages and side gates: treat these like front doors; they are common entry points that often get skipped during planning.
Measurement basics: lumens, footcandles, and mounting height
Lumens measure total light output from a bulb, while footcandles measure how much of that light actually lands on a surface, which is the number that matters for security. A 2026-era IES security lighting guide outlines mounting-height and uniformity targets specifically for security zones rather than general outdoor use.
- Entry doors generally call for higher footcandle levels than open yard areas, since facial recognition at the door matters more than ambient visibility.
- Driveways and walkways need even coverage more than peak brightness; a single hot spot surrounded by shadow is worse than modest, uniform light.
- Mounting height should account for lumen depreciation over the bulb’s life, since output drops gradually and fixtures mounted too low lose effective coverage sooner.
Quick test: walk the perimeter at night with your phone’s camera on manual exposure and look for dark gaps between light pools; if your eyes adjust and still struggle to make out a face at 10 feet, the fixture needs repositioning or a brighter, better-aimed bulb. For larger commercial sites, a formal photometric study replaces guesswork with a modeled layout before installation, and municipal lighting-plan guidelines from Townsend, Delaware outline exactly what such a plan should include: fixture models, lumen output, mounting heights, and footcandle grids at property lines.
How to place lights relative to your security cameras
Lighting and cameras work against each other when placed carelessly. A fixture aimed toward a camera lens causes glare and washes out the footage it’s supposed to improve, so the first rule is to keep every light fixture outside the camera’s field of view.
- Mount lights higher than cameras where possible, so the beam falls on the scene rather than crossing the lens path.
- Aim fixtures to illuminate faces and entry points at the height a person would stand, not the ground directly below the camera.
- Use camera-linked lighting or short-duration motion triggers rather than constant floodlighting, since brief, well-timed illumination captures a clearer image without creating round-the-clock glare for the camera’s sensor to compensate for.
Vertical illuminance at face height, not raw brightness, is what makes footage useful for identification, a point reinforced by IES guidance on security zones.
Choosing fixtures that protect without overlighting
Full-cutoff or fully shielded fixtures direct light downward only, cutting the glare and light trespass that unshielded floodlights create. The National Park Service’s outdoor lighting principles make the case plainly: more light is not always better, and properly shielded, targeted lighting improves visibility more than brute brightness does.
- Choose fixtures rated for zero uplight, meaning no light escapes upward past the fixture housing.
- Favor warm color temperatures around 2700K to 3000K, which reduce glare and are easier on human night vision than cooler, bluer light.
- Avoid raw, unshielded floodlights for anything near a shared fence line or a neighbor’s window.
- Use lumen caps and dimming controls to keep output matched to the task instead of running fixtures at full output all night.
DarkSky’s Approved Luminaires program sets technical criteria around shielding, color temperature, and dimming that line up closely with these principles, and the same shielding logic applies to low-voltage landscape fixtures, where warm 2700K lighting is a common recommendation for residential paths.
Pro Tip: If a neighbor can see the bulb itself rather than just the light it casts, the fixture needs a shield or a steeper downward angle.

Controls, sensors, and timing that actually help
The right control strategy depends on the zone. Motion sensors suit entries and side yards where sudden light startles an approaching person. Dusk-to-dawn timers suit walkways where steady, low-level visibility matters more than surprise.
- Set motion sensors at entries and gates, since a sudden light change is the deterrent, not constant brightness.
- Put driveways and shared pathways on scheduled timers or dimmed dusk-to-dawn settings rather than full motion control, since they see repeated legitimate traffic.
- Zone your circuits separately for entries, perimeter, and parking so each area’s lighting can be adjusted or scheduled without affecting the rest.
- Pair motion sensors with a mid-night dimming stage rather than full shutoff, keeping some visibility while cutting energy use during low-traffic hours.
Smart hubs that tie lighting to camera triggers cut false alarms when sensor placement and sensitivity are tuned correctly, something DarkSky’s shielding guidance ties directly to stronger deterrence than constant floodlighting.
Installation tips and mistakes worth avoiding
The most common placement mistakes are aiming a fixture at a neighbor’s window, creating a glare source that blinds rather than reveals, and accidentally lighting a camera lens instead of the scene it’s meant to capture. Each has a quick fix: add a shield, remount at a steeper downward angle, or swap to a warmer, lower-glare bulb.
- Test your layout by photographing the property from each camera’s angle before calling the job finished.
- Walk the site after dark and note any hot spots or dark corners where shadows pool near doors or gates.
- Recheck fixture aim after storms or landscaping changes, since growing branches shift coverage over time.
Pro Tip: Photograph your lighting setup at night once a season; shifting shadows from landscaping changes are easy to miss otherwise.
Hire a licensed electrician when a project involves pole wiring, a circuit-capacity upgrade, permit filings, or a formal photometric study, since these carry code and liability considerations beyond a DIY fixture swap.
Applying these placement rules in practice
We handle the electrical side of these placement decisions directly: exterior fixture wiring, panel checks, and circuits for pole-mounted or multi-zone lighting setups. As an electrical and handyman team, we document site plans and cut sheets so installations hold up to code review and insurance questions later.
Connecting security lighting to your home security system
Lighting and a home security system work best as one coordinated layer rather than two separate purchases. Many alarm panels and smart hubs now accept triggers from motion-sensor lights, meaning a triggered fixture can simultaneously send a mobile alert or start camera recording instead of just turning on a bulb.

Smart plugs and switches let you bring older, non-networked fixtures into a connected system without replacing the fixture itself, which is often the simplest upgrade for an existing property. Pairing a motion light with a door or window sensor also cuts down on false alerts, since the system can confirm movement at the exact point the light activated rather than relying on the light alone.
For garages and side entries, a camera positioned to view the same zone a motion light covers gives you both the deterrent flash and a usable image if something does happen. Keep the light’s trigger zone slightly wider than the camera’s field of view so the fixture activates a beat before someone enters frame, giving the camera a properly lit scene instead of catching the first second still in shadow.
Scheduling matters too. A system that dims perimeter lights at midnight but keeps entry points on full motion response balances energy use against the hours when unexpected activity matters most. The goal is a setup where lighting, sensors, and recording respond together, not a porch light that happens to switch on near a camera that happens to be running.
A practical view on deterrence versus neighborhood impact
Targeted motion lighting at doors and gates deters more effectively than a yard lit like a stadium, and it costs less in energy and goodwill. I’d rather see three well-aimed, shielded fixtures than one floodlight bright enough to annoy three neighbors. Document your choices, including fixture specs and aim angles, since that record helps with insurance claims and any permit questions later.
— Van Castaneda
How we can help with electrical and outdoor lighting work
Getting placement right often means circuit work most homeowners shouldn’t tackle solo: adding outlets for pole fixtures, upgrading a panel to support added load, or running wiring for a zoned, multi-circuit layout. We handle outdoor lighting installation, inspections, and panel upgrades across Cerritos, Long Beach, and the surrounding Los Angeles and Orange County areas, with licensed electricians, insurance, and upfront pricing before work starts.

When vetting any contractor for this kind of work, look for:
- A current electrical license and proof of insurance.
- Local references or a visible service history in your area.
- A written site plan rather than a verbal estimate.
If you want a fixture layout checked or upgraded, schedule an electrical inspection and we’ll walk the property with you before any work begins.
FAQ
How do you lay out landscape lighting for security and curb appeal?
Start with access points and walkways, then fill in accent lighting for landscape features last. Keep fixtures low-voltage and shielded, spacing path lights evenly so there are no dark gaps a person could stand in unseen.
What are the five main types of outdoor security lighting?
The common categories are continuous or dusk-to-dawn lighting, motion-activated lighting, floodlights, wall packs, and pathway or step lighting. Each suits a different zone, from wide perimeter coverage to low-level walkway guidance.
What makes a security light actually effective?
An effective security light is shielded to direct light downward, uses a warm color temperature around 2700K to 3000K, and sits on a motion sensor or timer rather than running at full output all night. The National Park Service’s lighting principles note that more light isn’t automatically better; targeted, controlled lighting improves visibility more than raw brightness.
Do burglars avoid houses that are well lit?
Research on street lighting supports this: a randomized study in New York City found a substantial reduction in nighttime outdoor index crimes in areas with increased lighting. Motion-triggered lighting at entry points adds a surprise element that steady lighting alone doesn’t provide.
Does System Wide Services install outdoor security lighting?
Yes, our electrical team installs and wires outdoor lighting, including fixtures for entries, driveways, and perimeter zones, as part of our electrical services across Cerritos and the surrounding Long Beach and greater Los Angeles and Orange County areas. We also handle any panel upgrades needed to support the added circuits.
Sources
- NYC street lighting — Reducing crime through environmental design | University of Chicago Urban Labs
- Outdoor lighting principles | National Park Service
- DarkSky Approved Luminaires program packet V3 2025 | DarkSky International
- Guidelines for good exterior lighting plans (Townsend, DE)
Recommended
Need a hand with this? We've got you covered.
System Wide Services handles plumbing, electrical, and handyman work across Long Beach and LA & Orange County.