
Sellers: Lighting Moves That Boost Resale Value in 60–90 Days
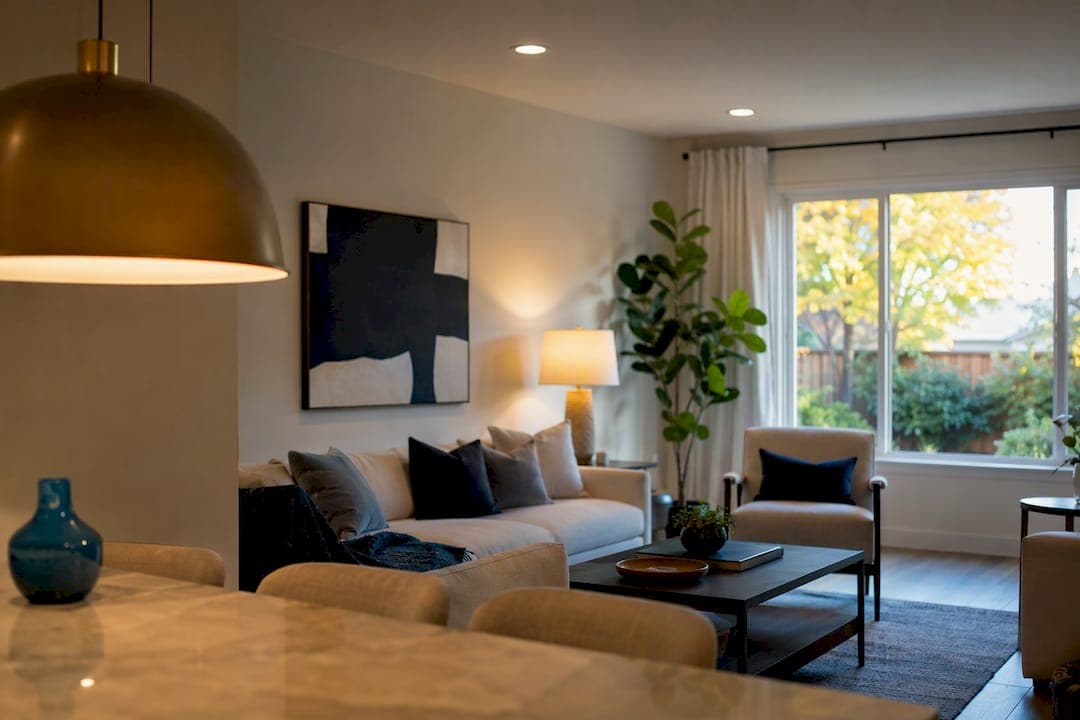
Lighting upgrades can meaningfully improve how buyers perceive your home, and they tend to move fast, cost-effective wins ahead of slow, expensive ones. The upgrades that matter most are standardized bulbs and color temperature, kitchen pendants, updated vanity fixtures, exterior and entry lighting, and layered living room lighting. Most of these run $30 to $1,000 per fixture, and only a few require an electrician.
TL;DR:
- Standardizing bulbs to 2700K-3000K LED lighting creates a cohesive look and significantly enhances buyer perception, especially in main living spaces.
- Upgrading dated fixtures in key areas like the kitchen, primary bathroom, and entry immediately improves listing photos and quickens the sale process.
- Cost-effective upgrades, such as adding dimmers, layered lighting, and simple controls, provide tangible appeal and are often inexpensive to implement.
- Prioritizing lighting improvements in high-traffic, highly visible rooms and avoiding overspending that exceeds neighborhood standards maximizes return.
- Professional installation of complex fixtures or electrical systems should be handled by licensed electricians to ensure safety, code compliance, and timely completion.
Table of Contents
- What Lighting Upgrades Increase Resale Value the Most?
- Which Rooms Should You Prioritize First?
- How Do Bulbs, Color, and Controls Affect Buyer Perception?
- What Do These Upgrades Cost, and Do They Pay Off?
- How Should You Sequence Upgrades Before Listing?
- When Should You Hire an Electrician for Lighting Work?
- A Seller’s Honest Take on Lighting Upgrades
- Getting Your Lighting Upgrade-Ready Before You List
- Sources
- FAQ
What Lighting Upgrades Increase Resale Value the Most?
Not every lighting fix carries equal weight with buyers. Some changes cost almost nothing and get noticed immediately. Others cost more but solve a specific problem buyers flag during walkthroughs, like a dark kitchen corner or a bathroom that photographs yellow. Here’s what actually moves the needle before a listing goes live.
- Standardize your bulbs. Mixed color temperatures (some rooms warm, some cold) make a home feel patched together. Swap everything to LEDs in the 2700K to 3000K range for living spaces, since consistent color temperature avoids that disjointed feel buyers pick up on without knowing why.
- Replace dated builder fixtures. Flush mounts from the original build era read as tired even in a well-maintained home. New pendants or flush mounts over a kitchen island, entry, or dining table cost roughly $30 to $100 per fixture and change the whole room’s first impression.
- Upgrade bathroom vanity lighting. A backlit or framed mirror paired with a modern vanity fixture makes a bathroom look renovated even when nothing else changed.
- Add layered lighting with dimmers. Ambient, task, and accent lighting working together (instead of one overhead fixture doing all the work) eliminates the dark corners that make listing photos look flat.
- Improve exterior and entry lighting. Landscape and porch lighting shapes the drive-by impression before a buyer ever opens the car door, and it signals safety after dark.
- Add simple controls. Dimmers, an all-off switch by the main exit, or a basic smart switch give you something tangible to demonstrate during a showing.
Each of these works on its own, but they compound. A buyer who walks into a well-lit entry, sees a scaled pendant over the island, and notices consistent warm light throughout is building a favorable impression before your agent says a word.
Which Rooms Should You Prioritize First?
Buyers form opinions room by room, and some rooms carry disproportionate weight in that judgment. Fix these in order, and don’t spread your budget evenly across the house.
- Kitchen first. Pendants over the island, under-cabinet task lighting, and evenly spaced recessed cans make the kitchen look intentional instead of thrown together. This room appears in more listing photos than any other, so inconsistent lighting here shows up in every online search result your home generates.
- Primary bathroom second. Swap the vanity fixture and add layered mirror lighting rather than relying on a single bright bar, which tends to cast harsh shadows across faces. Keep the color temperature in the 2700K to 3000K range to match the rest of the home. Buyers touring in person notice this room closely since it’s one they’ll use daily.
- Entry and dining third. One properly scaled statement fixture anchors both the listing photos and the in-person tour. A too-small fixture in a large entry makes the whole space feel undersized, even when the square footage is fine.
- Living room fourth. Layer ambient light with accent and adjustable task fixtures. A living room lit only by one central ceiling fixture almost always has dark perimeter corners, and those corners photograph poorly and feel unfinished in person.
- Secondary rooms last. Bedrooms, hallways, and guest bathrooms need consistent quality, not luxury upgrades. Replace anything obviously dated, like a hallway fixture with visible yellowing or a broken diffuser, but resist the urge to install high-end fixtures in rooms buyers spend thirty seconds in.
The pattern here isn’t complicated: spend where buyers linger and where cameras point, and keep everything else simply clean and consistent. A bathroom remodel that includes updated vanity lighting tends to deliver more visible return per dollar than almost any other single room project, largely because bathrooms are where dated lighting is most obvious.
How Do Bulbs, Color, and Controls Affect Buyer Perception?
Watts tell you how much energy a bulb draws. Lumens tell you how bright it actually is, and lumens are what you should shop by. A living room lamp generally needs 800 to 1,100 lumens per bulb, kitchen task lighting benefits from brighter output in the 1,100 to 1,600 lumen range, and bathroom vanities land somewhere in between depending on mirror size.
Color temperature matters just as much as brightness. Living areas and bedrooms look their best at 2700K to 3000K, a warm white that feels inviting in photos and in person. Task areas like kitchens and home offices can run slightly cooler, from 3000K to 4000K, without feeling clinical. The mistake most sellers make is mixing these ranges room to room, which creates the patched-together look buyers register instantly even if they can’t name why.
- Choose dimmable LED bulbs specifically. Standard LEDs sometimes flicker or hum when dimmed.
- Add scene switches in main living areas so you can set a warm, even glow before every showing.
- Consider a basic smart switch with app control and an all-off feature. Smart lighting features correlate with buyer appeal in feature analyses, and demonstrating a scene during a showing gives agents something memorable to point to.
Pro Tip: Buy one bulb brand and lumen output for every fixture in a room, even across different fixture types. A pendant and two recessed cans in the same kitchen should all read the same white, or the room will look uneven in photos no matter how good each individual fixture is.
What Do These Upgrades Cost, and Do They Pay Off?
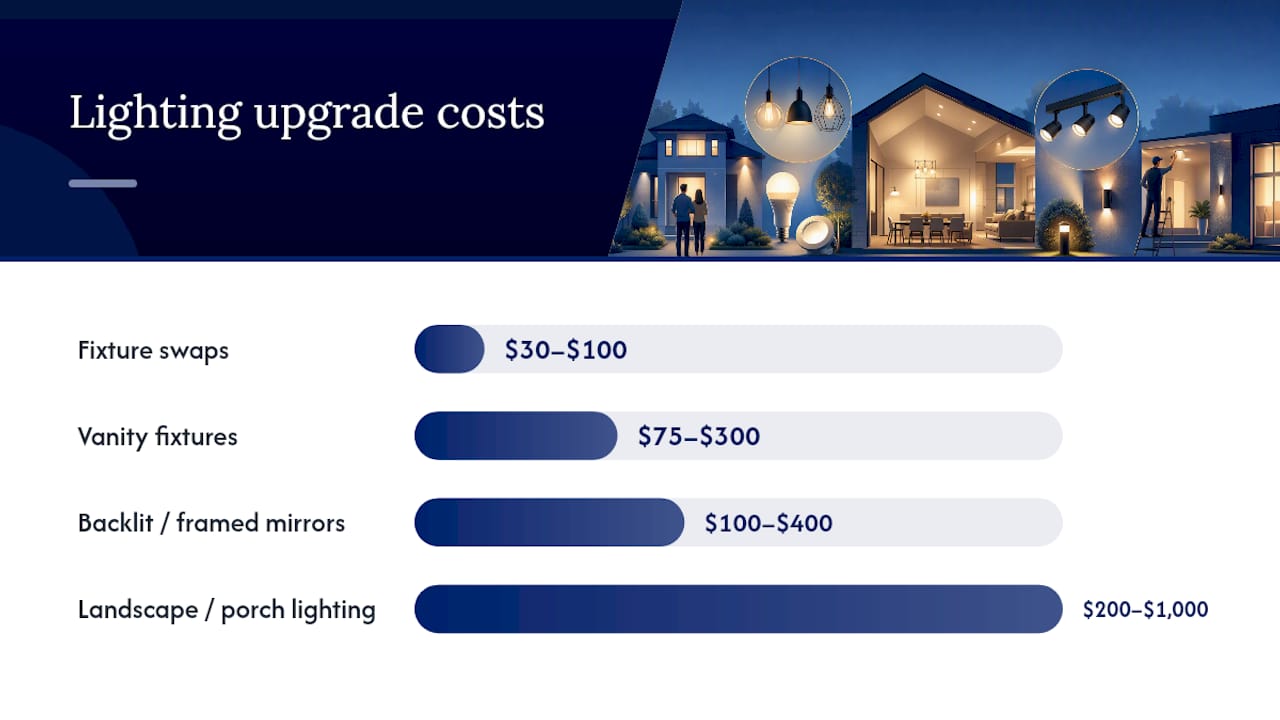
Cost ranges for lighting upgrades are modest compared to most resale projects. Fixture swaps run $30 to $100 each, vanity fixtures land at $75 to $300, backlit or framed mirrors run $100 to $400, and landscape or porch lighting typically costs $200 to $1,000 depending on how many fixtures and how much wiring the job needs.
Documented ROI: One published flip case showed a focused lighting package producing more than 100% gross ROI on the lighting spend itself, driven by better listing photos and reduced carrying costs from a faster sale.
That kind of return isn’t guaranteed on every home, but it illustrates the mechanism: lighting doesn’t just make a house look nicer, it shortens the time a house sits unsold. Buyers form impressions from listing photos within seconds, and a home with even, well-placed light photographs better than a nearly identical home with dated or mismatched fixtures.
Weigh cost against buyer-notice impact before you spend. A $60 pendant swap in a kitchen that gets photographed constantly beats a $600 dining room chandelier in a home that’s already mid-range for its neighborhood. Don’t install fixtures priced well above what comparable homes on your street are showing. Overspending on lighting in a starter home doesn’t pull the sale price up. It just eats into your margin.
How Should You Sequence Upgrades Before Listing?
Work through lighting changes in a fixed order over the 60 to 90 days before you list, starting with the cheapest fixes and building toward anything that needs a professional.
- Standardize and repair first. Swap every bulb to matching LEDs, replace yellowed switch plates and outlet covers, and fix anything obviously broken. This step costs the least and removes the small annoyances that make a home feel neglected.
- Upgrade your highest-traffic photo rooms next. Pick one high-impact swap each for the kitchen, primary bathroom, and living room; don’t try to redo every fixture in the house.
- Add layering and controls if your budget allows. Dimmers, scene switches, or a smart switch in the main living area give you something to demonstrate live during showings.
Weigh each potential upgrade against four factors: how urgent the fix is, how likely a buyer is to notice it, what it costs, and how complex the install is. A cracked outlet cover scores high on urgency and low on cost, so it goes first. A full recessed lighting overhaul scores high on buyer-notice but also high on cost and complexity, so it goes last, if at all.
When Should You Hire an Electrician for Lighting Work?
Some lighting jobs are safe weekend projects. Bulb swaps, plug-in lamps, and solar path lights need no special skill. Anything involving new hardwired fixtures, dimmer retrofits on old wiring, moving recessed cans, or adding circuits is a different category, and that’s where a licensed electrician protects both your safety and your sale.
- Exterior and bathroom fixtures need proper wet or damp ratings; the wrong fixture in a wet location is a code violation an inspector will flag.
- Recessed cans installed near insulation need IC-rated housings, and skipping that detail creates a fire risk that can surface during a home inspection.
- Older homes attempting multiple new lighting circuits sometimes run into panel capacity limits, which is worth checking before you commit to a bigger layered lighting plan.
A reputable local electrical contractor should offer clear upfront pricing, handle permits when the job requires one, and coordinate scheduling around your listing timeline. Indoor lighting installation done right the first time avoids the callback visits that eat into your pre-listing window.
A Seller’s Honest Take on Lighting Upgrades
Spend where buyers look first: your entry, your kitchen, your primary bathroom, and your listing photos. Everything else is secondary. The biggest mistake I see sellers make isn’t skipping lighting upgrades, it’s overspending on fixtures that outclass the rest of the house. Match your spending to your neighborhood’s price band, not to what looks impressive in a showroom. Once the work is done, write it down. “New pendant lighting, updated vanity fixtures, LED throughout” is a sentence your agent can use in the listing description, and it’s the kind of detail that separates your home from three others with identical square footage.
— Van Castaneda
Getting Your Lighting Upgrade-Ready Before You List
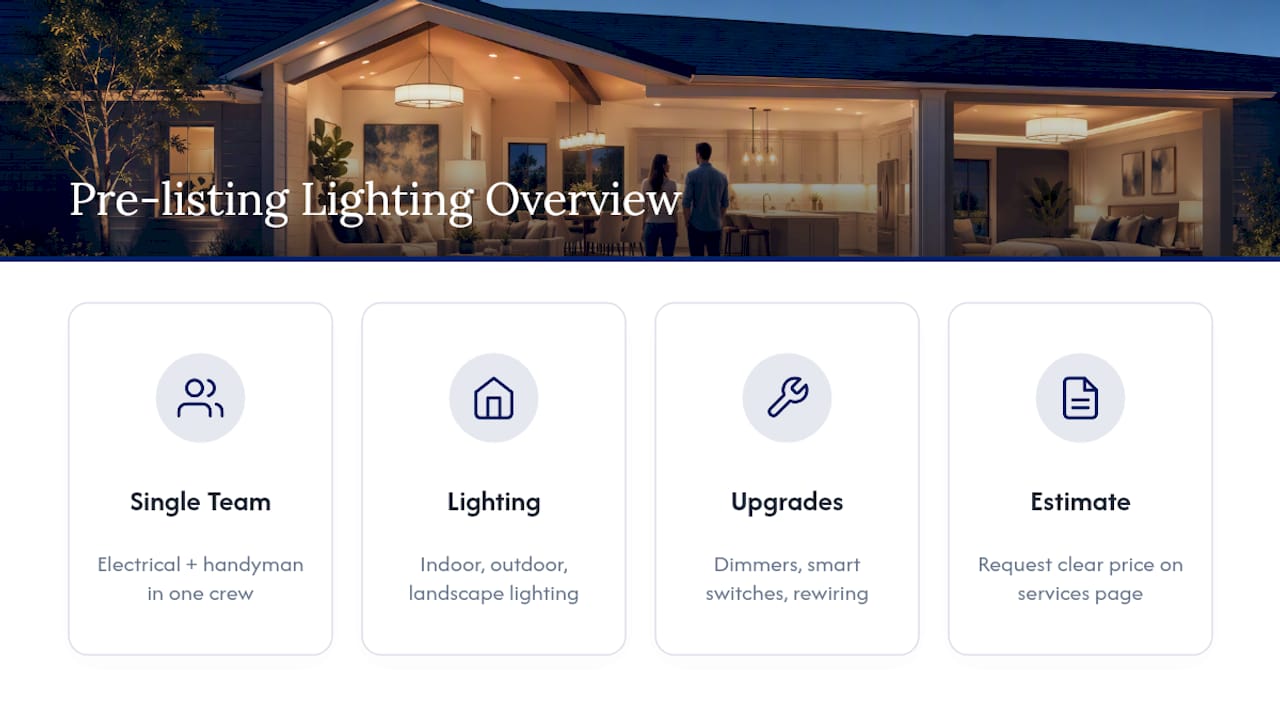
A single licensed team can handle electrical work and handyman details together for lighting preparation before a sale, eliminating the need to schedule multiple separate contractors for tasks like pendant swaps, vanity fixture updates, and touch-up paint jobs.
The team installs indoor lighting and outdoor and landscape lighting, wires in dimmers and smart switches, and handles whole-home rewiring or panel upgrades if your circuits can’t support a bigger layered lighting plan. Same-day and emergency response means a fixture failure days before a showing doesn’t have to derail your timeline. For staging help beyond lighting, a pre-listing junk removal and staging checklist pairs well with these upgrades.
Request an estimate through the electrical services page and get a clear, upfront price before you commit to a pre-listing lighting plan.
Sources
Cost ranges and ROI figures throughout this article come from Opendoor, Zillow, Lifehacker, and a documented flip lighting ROI case study.
- How to increase your home value | Opendoor
- Lighting upgrades that increase home value: what buyers notice | Build-Construct
- Best home improvements to increase value | Zillow
FAQ
Does Upgrading Light Fixtures Increase Home Value?
Upgrading light fixtures generally improves buyer perception and listing photo quality rather than adding a fixed dollar amount to appraised value, and it often shortens time on market, which is where much of the practical return comes from.
What Upgrades Increase Home Value the Most?
Kitchen and bathroom updates typically lead the list, and lighting fits into both since modern vanity fixtures and pendant lighting are among the lowest-cost ways to modernize those rooms.
What Is the 5’7" Lighting Rule?
This isn’t a standard lighting or building code rule, and definitions of it vary widely online. Focus instead on scaled fixtures and consistent 2700K to 3000K color temperature, which have documented buyer-perception support.
What Is the 30% Rule for Renovations?
The 30% rule generally suggests capping renovation spending at around 30% of a home’s value to avoid over-improving beyond the neighborhood’s price band, which aligns with the caution against installing luxury lighting in a mid-range home.
Can System Wide Services Install Lighting Before I List My Home?
Yes. System Wide Services handles indoor and outdoor lighting installation, dimmer and smart switch upgrades, and panel work across its Los Angeles and Orange County service area, with same-day response available.
Recommended
Need a hand with this? We've got you covered.
System Wide Services handles plumbing, electrical, and handyman work across Long Beach and LA & Orange County.